________________________________________________________________________________
John Deere 1025R, 1023E - Transmission and Axles
John Deere 1025R, 1023E Transmission
Check Transmission Oil Level
Park the machine safely. Allow the machine to cool down for at least 1
hour. Pull to remove the dipstick, at the right side of the
transmission. Wipe with a clean cloth. Install the dipstick. Remove the
dipstick. Check the oil level on dipstick. Ensure that the oil level is
between levels on the dipstick. Do not overfill the transmission. Oil
expands during operation and could overflow. If oil level is low: Remove
the fill cap. Add recommended oil through the fill opening until the oil
level is correct. If the oil is above the top mark on the dipstick,
drain to the proper level. Install the dipstick. Install and tighten the
fill cap.
Change Transmission Oil and Filter
Run the engine a few minutes to warm the transmission oil. Park the
machine safely. Position the drain pan under the transmission drain
plug. Remove the plug and allow the oil to drain completely. Position
the drain pan under the transaxle oil filter. Remove and discard the
filter. Allow the residual oil to drain completely. Put a film of clean
transmission oil on the seal of the new filter.
Fill the filter 1/3 - 1/2 full of oil. Install the filter and turn
clockwise until the gasket contacts the mounting surface. Tighten 1/2 -
3/4 turn after gasket contact. Install and tighten the drain plug. Do
not overfill the transmission. Oil expands during operation and could
overflow. Remove the fill cap. Add transmission oil into the fill
opening. Install the fill cap. Start the engine. Check for oil leaks.
Stop the engine. Check the transmission oil level. Add oil if necessary.
John Deere 1025R, 1023E - Remove and Install
Oil Suction Screen
Park the machine safely. Remove the backhoe, if installed. Lower the
machine onto the jack stands or other stable supports and block the
wheels before servicing. Raise the rear of machine, and remove the left
rear wheel. Lower the machine onto the jackstand under the left side of
the transmission. Place a drain pan under the left side of the
transmission.
Drain the transmission. Remove the bolt from the suction pipe. Remove
the suction hose from the hydraulic pump. Remove the hose from the
manifold. If the suction screen does not come out with the lower
manifold, reach in and remove screen from transmission. Be certain all
O-Rings remain on assemblies. Remove the bolt and the suction screen
assembly. Machines have one, two, or four magnets in screen. Clean the
suction screen.
Remove the magnets from the screen. Clean the magnets and install into
the screen. Lubricate and install the suction screen to lower manifold.
Make sure that the screen is fitted straight into the elbow to aide
proper alignment to the transmission side cover. Suction screen must
remain perpendicular to lower manifold for it to align properly into
flange area on the opposite side of JD 1025R, 1023E transmission.
Install the suction screen assembly into the transmission.
Make sure the end of the screen fits into the socket inside the right
side cover of the transmission. Install the bolt and tighten to
specification. Install the suction hose onto the hydraulic pump. Secure
with the hose clamp. Install the hose onto the manifold. Secure with the
hose clamp. Install the bolt into the suction pipe. Bolt Torque - 11 Nm
(97 lb-in). Fill the transmission with oil, Check for the proper oil
level.
John Deere 1025R, 1023E Front Axle
Check Front Axle Oil Level
To ensure accurate dipstick reading, allow oil to settle for one hour
before checking. Repeat oil level check after several hours of
operation. Park machine safely on level surface. Allow machine to cool
down for at least one hour. Dirt and debris cause damage to the
transaxle. Clean area around opening before removing dipstick. Loosen
and remove dipstick located on right side of front axle. Wipe dipstick
clean with a rag. Install dipstick but do not tighten. Allow dipstick to
rest on top of threads. Remove dipstick. Oil level should be between
high and low levels on dipstick. If oil level is low: Add recommended
oil through dipstick fill opening until oil level is correct. Install
and tighten dipstick.
Change Front Axle Oil
Warm front axle oil by operating machine. Park machine safely. Position
drain pan under the differential drain plug. Remove the differential
drain plug and allow oil to drain. Position drain pan under each front
axle drain plug. Remove both drain plugs and allow oil to drain. Install
and tighten both drain plugs after all oil has drained. Remove dipstick
on the right side of the front axle and vent plug. Add approximately 2.8
L (3.0 qt) of recommended oil through dipstick fill opening until oil
level is correct. Install and tighten the dipstick. To ensure accurate
dipstick reading, allow oil to settle for 1 hour before checking. Repeat
oil level check after several hours of operation. Check front axle oil
level.
Lubricate MFWD Driveshaft
Loosen hose clamp and remove front MFWD shield from housing. Lubricate
front MFWD driveshaft grease fitting and rear MFWD driveshaft grease
fitting with John Deere multi-purpose grease. Install MFWD shield on
housing and tighten hose clamp.
JD 1025R, 1023E - Remove and Install Wheels
Front Wheel Removal
Loosen lug bolts slightly before raising front axle. Raise front of
machine and lower onto support stands so that front axle supports
machine. If the front wheels are being removed to perform work on the
front axles, lower machine onto suitable stands that support the machine
by the frame. Remove lug bolts and wheel.
Front Wheel Installation
Install wheels onto axle, insert lug bolts, and lightly tighten bolts.
Raise front of machine, remove support stands and lower machine to
floor. Tighten wheel bolts alternately to specification. Wheel Bolt
Torque - 95 Nm (70 lb-ft)
Rear Wheel Removal
Loosen lug bolts slightly before raising machine rear axle. Raise rear
of machine and lower onto support stands so that rear axle supports
machine. Remove lug bolts and wheel.
Rear Wheel Installation
Install wheels onto axle, insert lug bolts, and lightly tighten bolts.
Raise rear of machine, remove support stands and lower machine to floor.
Tighten wheel bolts alternately to specification. Wheel Bolt Torque - 95
Nm (70 lb·ft).
John Deere 1025R, 1023E - Select Front Tire
Rolling Direction
JD 1025R, 1023E tractor is equipped with directional type tires (such as
bar tires) and have directional arrows on the tire sidewall. Install the
tires with the directional arrow pointing in the direction of travel. To
increase tire life when the tractor is used mainly for loader operations
and improve traction while backing out of dirt piles, reverse the lug
direction. If the tractor is manly used for loader operations, lug
direction may be reversed on the MFWD axle for improved tire wear and
increased traction. Change the tire rolling direction by moving the
wheel from one side of the machine to the other. Install the wheel with
the valve stem facing outwards.
John Deere 1025R, 1023E - Differential Lock
and PTO Driveshaft
Differential Lock (Traction Assist)
The differential lock is used to provide better traction when the rear
wheels start to slip. With the differential lock engaged, the right and
left side rear axles are locked together and both rear wheels turn at
equal speeds for maximum traction. Reduce speed and allow the drive
wheels to rotate at the same speed before engaging or disengaging the
traction assist. Disengage the traction assist when driving on asphalt
or concrete. Use the traction assist only when necessary for improved
ground engagement. The turning radius is increased when the differential
lock is engaged.
Engage Differential Lock
Stop or slow the machine movement. The differential lock remains engaged
as long as the rear wheel slippage occurs. If the tires slip and regain
traction repeatedly, hold down the differential lock pedal so
differential lock remains engaged. To engage the differential lock, push
down on the differential lock pedal.
Disengage Differential Lock
Remove foot from the differential lock pedal. Rear wheel slippage keeps
differential lock engaged. Lock automatically disengages when traction
equalizes. If lock does not disengage when removing foot from pedal,
depress brake pedal to equalize traction, then release.
John Deere 1025R, 1023E - Check PTO Driveshaft
Length
Check PTO driveshaft movement before operating implement. Park machine
safely. Install driveshaft on implement. Attach implement to tractor. Do
not install the driveshaft on tractor. Check the fully shortened
position of the driveshaft. Push the driveshaft in to its shortest
length by hand. Check the area where the outer tube shield meets the
shield bell. If the outer tube shield does not touch the shield bell,
make a mark on the inner tube where the outer tube shield ends. Install
driveshaft on tractor and adjust the center link to level the implement
for operating while in lowered position.
Have an observer stand a safe distance from the implement to tell you
when the driveshaft is fully shortened. Set the tractor at low idle and
raise the implement. Stop raising the implement when the outer tube
shield reaches the mark on the inner tube, or the outer tube shield
touches the shield bell. If the implement is fully raised and the
driveshaft does not reach the fully shortened position, with either the
outer tube shield at the mark or touching the bell shield, the
driveshaft is ready for operation. If the driveshaft reaches the fully
shortened position before the implement is fully raised, the driveshaft
requires shortening.
Shortening the PTO Driveshaft
Remove 25 mm (1 in) from the ends of the driveshaft and the ends of the
shield tubes. Check driveshaft length again and shorten further if
needed.
________________________________________________________________________________
________________________________________________________________________________________
________________________________________________________________________________________
________________________________________________________________________________________
________________________________________________________________________________________
________________________________________________________________________________________
________________________________________________________________________________________
________________________________________________________________________________________
________________________________________________________________________________________
________________________________________________________________________________________
________________________________________________________________________________________
________________________________________________________________________________________
________________________________________________________________________________________
________________________________________________________________________________________
________________________________________________________________________________________
________________________________________________________________________________________
________________________________________________________________________________________
________________________________________________________________________________________
________________________________________________________________________________________
________________________________________________________________________________________
________________________________________________________________________________________
________________________________________________________________________________________
________________________________________________________________________________________
________________________________________________________________________________________
________________________________________________________________________________________
________________________________________________________________________________________
________________________________________________________________________________________
________________________________________________________________________________________
________________________________________________________________________________________
________________________________________________________________________________________
________________________________________________________________________________________
________________________________________________________________________________________
________________________________________________________________________________________
________________________________________________________________________________________
________________________________________________________________________________________
________________________________________________________________________________________
________________________________________________________________________________________
________________________________________________________________________________________
________________________________________________________________________________________
________________________________________________________________________________________
________________________________________________________________________________________
________________________________________________________________________________________
________________________________________________________________________________________
________________________________________________________________________________________
________________________________________________________________________________________

 JD SPECS
 JD LOADERS
 JD MAINTENANCE
 JD INSTRUCTIONS
 JD PROBLEMS
 JD 2025R
 JD 3039R
 JD 4044R
 JD 4105
 JD 4720
 420 Loader
 419 Loader
 510 Loader
 512 Loader
 520 Loader
 520M Loader
 540M NSL
 540 Loader
 440R Loader
 H180 Loader
 JD 5045E
 JD 5085E
 JD 5100M
 JD 6105R
 JD 6120M
 JD 6155M
 JD 6195R
 JD 6210R
 JD 7210R
 JD 7250R
 JD 7310R
 JD 8245R
 JD 8295R
 JD 8370R
 JD 9370R
 120R Loader
 D120 Loader
 H120 Loader
 45 Loader
 200CX Loader
 D160 Loader
 D170 Loader
 H160 Loader
 H165 Loader
 H240 Loader
 210 Loader
 220R Loader
 300E Loader
 300X Loader
 300CX Loader
 JD 9420R
 JD 9510R
 JD GX335
 JD GX85
 JD LA105
 JD 5065M
 JD 5055D
 JD 5115R
 JD 5105M
 JD 6110R
 JD 6130D
 JD 6225
 JD 7530
 JD 4044M
 JD 7185J
 300 Loader
 300R Loader
 320R Loader
 400E Loader
 410 Loader
 430 Loader
 460 Loader
 521 Loader
 531 Loader
 541 Loader
 551 Loader
 631 Loader
 651 Loader
 661 Loader
 603R Loader
 JD D130
 JD D160
 JD 325
 JD 335
 JD 345
 JD 2520
 JD 3005
 JD 3720
 JD 1025R
 JD 3033R
 JD 5090EL
 JD 5100MH
 JD 5075GV
 JD 6090RC
 JD 6110B
 623R Loader
 643R Loader
 731 Loader
 746 Loader
 751 Loader
 533 Loader
 583 Loader
 633 Loader
 653 Loader
 683 Loader
 H260 Loader
 663R Loader
 663 Loader
 683R Loader
 753 Loader
 JD 6125J
 JD 6150RH
 JD 6210J
 JD 7195J
 JD 8310
 JD 6325
 JD 5525
 JD 5083EN
 JD 5100GN
 JD 5125R
 210C Backhoe
 300D Backhoe
 310G Backhoe
 410G Backhoe
 710G Backhoe
 80 Loader
 100 Loader
 146 Loader
 148 Loader
 158 Loader
 168 Loader
 175 Loader
 522 Loader
 542 Loader
 540R Loader
 562 Loader
 563 Loader
 673 Loader
 741 Loader
 L108 Automatic
 L120 Automatic
 LA110 Automatic
 LA120 Automatic
 LA150 Automatic
 LT155
LT155 LT160 Automatic
 LT180 Automatic
 LTR180
 X165
X165 E100
E100 E120
E120 E150
E150 LTR166
 LA135
LA135 LA165
LA165 LX277
LX277 LX288
LX288 LX255
LX255 S240
S240 GT235
GT235 G110 Automatic
 JD 3203
 JD 5520
 JD 316
 JD 420
 JD 425
 JD 445
 JD_5050D
 X300
X300 X304
X304 X310
X310 X110 Automatic
 H310 Loader
 H340 Loader
 H360 Loader
 H380 Loader
 H480 Loader
 240 Loader
 245 Loader
 260 Loader
 265 Loader
 600R Loader
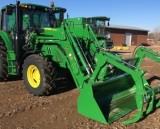 620R Loader
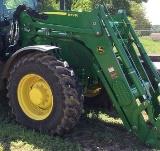 640R Loader
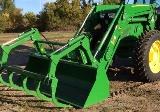 660R Loader
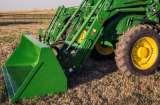 680R Loader
 JD_5039D
 X146R
X146R X360
X360 X155R
X155R X140 Automatic
 X350
X350 X380
X380 X500
X500 X590
X590 X700
X700 3036E
3036E 2038R
2038R 3038R
3038R 4049M
4049M JD 4100
 X738
X738 X740
X740 X748
X748 X749
X749 X950R
X950R JD 4510
 5045D
5045D 5050E
5050E 5060E
5060E 5078E
5078E