
________________________________________________________________________________
Kubota B2601, B26, B26TLB - Transmission
Kubota B2601, B26, B26TLB Hydrostatic
Transmission - Front Case
In Kubota B2601, B26, B26TLB tractors, clutch disc is not installed. The
input flange (3) is installed on the clutch shaft (4). Power from the
engine is transmitted through the input flange (3) to the clutch shaft
(4) and HST pump shaft.
![]()
1-Flywheel, 2-Clutch Housing, 3-Input Flange, 4-Clutch Shaft, 5-Ball
Bearing, 6-Circlip, 7-Oil Seal, 8-Circlip, 9-Front Drive Shaft,
10-O-ring, 11-Circlip, 12-Ball Bearing, 13-O-ring, 14-Universal Joint,
15-Rear Drive Shaft
Kubota B2601, B26, B26TLB HST - Speed Set
Linkage
Speed Set
![]()
1-HST pedal, 2-Lever, 3-Speed Set Lever, 4-Speed Set Holder, 5-Brake
Pedal, 6-Tooth
The speed set device mainly consists of HST pedal holding section and
HST pedal releasing section. When the HST pedal (1) is see to the
desired position, the lever (2) turns counter clockwise. The speed set
lever (3) to the "ON" position. The speed set holder (4) turns counter
clockwise. On the other hand, sine lever engage with tooth (6) of speed
set holder (4), the HST pedal (1) is held at the desired set position
until the brake pedals (5) will be depressed by an operator.
Speed Set Release
![]()
1-HST pedal, 2-Lever, 3-Speed Set Lever, 4-Speed Set Holder, 5-Brake
Pedal, 6-Brake Link
The speed set release is done by depressing the brake pedals (5). When
an operator depresses the brake pedal (5), the brake link (6) is pushed
by the brake pedals (5). When brake link (6) is pressed, the speed set
holder (4) is released. If you step on the HST pedal on the forward
acceleration side, the speed set device will disengage.
Kubota B2601, B26, B26TLB Hydrostatic
Transmission - Checking And Adjusting
Readjustment of Relief Valve (When the HST
does not work due to its loose hexagon socket head screw)
Measure the pre-adjustment Relief Valve Length. Compress the spring of
the relief valve with a relief valve assembling tool. Then, find the
Relief Valve Length by turning the poppet with a screwdriver. The Relief
Valve Length changes by about 0.5 mm (0.0197 in.) per one turn of the
poppet. Repeat the same operation a few times to find the Relief Valve
Length as it is difficult to acquire at the first time. After finding
the Relief Valve Length, hold the setscrew to a vice and fasten the
hexagon socket head screw with specified torque. On this occasion, use a
copper plate, etc. for the vice jaws not to damage the setscrew. Install
the relief valve in Kubota B2301, B2601, B26, B26TLB HST. Check the
relief pressure. The Relief Valve Length is for refresh only. Make sure
to check the relief pressure after readjustment. If the relief pressure
does not fall within the readjustment pressure range, repeat the
processes of the above item 1 onward. Tightening torque Hex. socket head
screw - 24.5 to 29.5 Nm / 18.1 to 21.7 lbf-ft. Relief valve readjusting
pressure - 23 to 25 MPa / 3400 to 3600 psi. Relief Valve Length
Reference value 38.5 to 38.6 mm / 1.516 to 1.519 in.
Adjusting Neutral
Disengage the front wheel drive lever. (Drive only rear wheels). Lift
the rear of the tractor so that the rear wheels are off the ground and
operate Kubota B2301, B2601, B26, B26TLB engine at low idling and drive
only rear wheels. Slightly loosen the neutral adjuster setting screw.
Rotate the neutral adjuster clockwise so the rear wheels turn reverse.
Then rotate it counterclockwise until wheels stop completely. Put a mark
on the center frame aligning the groove on neutral adjuster. Rotate the
neutral adjuster counterclockwise so the rear wheels turn forward. Then
rotate it clockwise until wheels stop completely. Put a mark on the
center frame aligning the groove on neutral adjuster. Hold the neutral
adjuster so its groove is at the middle of the marks and tighten the
setting screw. When the wheels tend to turn forward, rotate neutral
adjuster clockwise. When the wheels tend to turn reverse, rotate neutral
adjuster counterclockwise.
Kubota B2601, B26, B26TLB - Dismounting the
Step and Floor Seat
HST Pedal, Floor Mat and Front Cover
Remove the HST pedal mounting bolts. Remove the HST pedal. Remove the
lower adjusting knob. Remove the front cover. Remove the floor mat. ROPS
- Disconnect the tail light connectors and turn signal light connectors.
Remove the tail lights. Remove the spring pins. Remove the bolt. Remove
the upper frame from lower frames. Remove the ROPS mounting bolts and
the lower frames.
Seat and Fenders
Remove the seat and the lever grips. Disconnect the electrical socket
connector. Remove the fender LH. Remove the fender RH. Remove the both
side steps and seat under cover. Disconnect the seat switch connector.
Remove the seat support.
Hydraulic Pipes and Others
Remove the clamps. Disconnect the suction pipe and delivery pipe.
Disconnect the loader valve pipes. Disconnect the independent PTO pipe.
Remove the right side brake rod and sub frame. Remove the left side
brake rod and sub frame. Disconnect the HST pedal switch connector.
Remove the frame support plate and spring. Remove the HST damper and
plate. Front loader valve pipe joint - 48 to 70 Nm / 36 to 51 lbf-ft.
3-point hitch delivery pipe joint bolt - 48 to 70 Nm / 36 to 51 lbf-ft.
Frame support plate mounting bolt (M12) - 64 to 74 Nm / 48 to 54 lbf-ft.
Sub frame mounting bolt (M12) - 80 to 90 Nm / 59 to 66 lbf-ft. Sub frame
mounting bolt (M14) - 126 to 150 Nm / 93.0 to 110 lbf-ft. Sub frame
mounting bolt (M10) - 40 to 45 Nm / 30 to 34 lbf-ft.
Kubota B2601, B26, B26TLB - Front Case and HST
Disassembly and Assembly
Clutch Housing
![]()
1.Bolt, 2.Engine Rear-End Plate, 3.Front Case, 4.Groove (for liquid
gasket), A.Front Case Corner
Support the engine securely. Remove the front case mounting bolts.
Remove the front case from engine. Front case mounting nut for aluminum
material (M8) - 17.7 to 20.5 Nm / 13.1 to 15.1 lbf-ft. Front case
mounting bolt for aluminum material (M10) - 39.3 to 44.1 Nm / 29.0 to
32.5 lbf-ft.
Clutch Shaft and Ball Bearing
Remove the oil seal. Remove the circlip. Remove the clutch shaft from
the front case.
Kubota B2601, B26, B26TLB Hydrostatic
Transmission Assembly
![]()
1.HST Assembly, 2.HST Assembly Mounting Bolt, 3.O-ring, 4.Groove (for
Liquid Gasket)
Remove the HST mounting bolts. Separate the HST assembly from the
transmission. Install the O-ring to the transmission case. Tightening
torque HST assembly mounting bolt (M10, aluminum) - 39.3 to 44.1 Nm /
29.0 to 32.5 lbf-ft.
Plate Push Rod, Neutral Arm and Neutral Holder
Remove the plate push rod. Remove the spring. Remove the neutral arm
mounting bolt. Loosen the bolt of the neutral holder. Remove the neutral
holder.
Center Section
Remove the center section mounting hex. bolts. Separate the HST housing
from the center section. Use a new gasket. Install the poppet to the
center section. Do not drop the spring. Check the knock pin. Hold the
gasket with the hex. bolts not to drop the gasket.
Oil Seals and Needle Bearings
Remove the needle bearing. Remove the oil seals. Center section mounting
hex. bolt (M10, aluminum) - 49 to 59 Nm / 37 to 43 lbf-ft.
Check and High Pressure Relief Valve
Remove the valve plug with a hex. wrench. Remove the spring and the
valve.
HST Housing Case Cylinder Blocks
![]()
1.Cylinder Block (Pump), 2.Pump Shaft, 3.Motor Shaft, 4.Cylinder Block
(Motor), 5.Spring, 6.Poppet
Remove the cylinder blocks from the pump shaft and the motor shaft.
Install the poppet to the center section, not to drop it. Install the
spring to the HST housing side.
Piston and Spring
Remove the pistons with the spring. Install the piston to its original
position of the cylinder block.
Motor Shaft and Pump Shaft
![]()
1.Pump Shaft, 2.Circlip, 3.Oil Seal, 4.Circlip, 5.Motor Shaft
Remove the circlip and oil seal from the HST housing. Remove the circlip
from the pump shaft. Remove the pump shaft. Remove the motor shaft.
Replace the used oil seal with a new one.
Trunnion Shaft
Remove the circlip and oil seal from the HST housing. Remove the circlip
from the trunnion shaft. Remove the swash plate. Strike out the trunnion
shaft slightly with a plastic hammer and remove the trunnion shaft.
Charge Relief Valve - Remove the spring and poppet. Check the spring for
breakage and wear.
Kubota B2601, B26, B26TLB - Independent PTO
Clutch and Mid-PTO
Installing PTO Clutch Shifter
Install the spring and the ball to transmission. Push the ball by finger
from the inside of the transmission case. Push the PTO shift arm ball
guide into the transmission case. Push the PTO shift arm ball guide with
the PTO shift arm. Install the PTO cotter to the PTO shift arm. Align
the PTO cotter to the groove of the PTO shifter.
PTO Clutch Case
![]()
1 - Ball Bearing, 2 - PTO Clutch Case, 3 - Brake Plate 4, 4 - Brake
Plate 2, 5 - PTO Clutch Shaft, 6 - Thrust Bearing, 7 - PTO Shifter, 8 -
25T Mid PTO-gear, 9 - Clutch Disc, 10 - Clutch Plate
Remove the external circlip from the spline boss. Remove the internal
circlip from the PTO clutch case. Remove the clutch discs and the clutch
plates from the PTO clutch case. Remove the ball bearing from the PTO
clutch case with a puller. When removing the circlip, use an adequate
size circlip pliers.
PTO Clutch Spring
Set the PTO clutch spring compressor to the PTO clutch case. Tighten the
nut and remove the external circlip. Remove the spring collar and the
PTO clutch spring.
PTO Clutch Discs and Brake
![]()
1.Clutch Piston, 2.Clutch Plate, 3.Clutch Disc, 4.Spline Boss,
5.Pressure Plate, 6.Internal Circlip, 7.Spring Collar, 8.External
Circlip, 9.Ball Bearing, 10.PTO Clutch Case, 11.Circlip, 12.Ball
Bearing, 13.Brake Plate, 14.PTO Brake Disc, 15.Brake Plate, 16.External
Circlip, 17.Bearing Collar, 18.Spring
After removing the inner circlip from the PTO clutch case, remove the
pressure plate. Remove the clutch discs and clutch plates. Remove the
external circlip from the spline boss. Remove the brake plate, the brake
discs and the brake plate. After removing the external circlip and the
spring.
Spline Boss Circlip
Push the circlip with a small screw driver through the small hole of the
spline boss. Lift the circlip with a screw driver not to damage it.
Install the circlip holding it by hands.
PTO Shaft
![]()
1 - PTO Clutch Shaft, 2 - Ball Bearing, 3 - 26T Mid-gear, 4 - PTO
Shifter, 5 - Seal Ring, 6 - Thrust Bearing, 7 - Needle Bearing, 8 -
Collar
Remove the thrust bearing and the PTO shifter not to damage the seal
rings located at the PTO shaft front side. Remove the seal rings located
at the PTO shaft rear side. Remove the ball bearing with a puller. Check
all seal rings. If the seal ring is damaged, replace it. Check the
direction of the thrust bearing and install the thrust bearing.
Mid-Gear and Idle Shaft
Remove the idle shaft from the transmission case using a screw driver.
Remove the mid-gear from the transmission case. Remove the ball bearings
and the internal circlip from the mid-gear. Install the internal circlip
to the inner groove of the mid-gear.
Mid-PTO Case and Mid-Gear Shaft
Remove the mid-PTO case mounting bolts. Remove the mid-PTO case from the
transmission case. Remove the mid-PTO oil seal from the mid-PTO case
using a screw driver not to damage it. Remove the internal circlip.
Remove the mid-gear shaft with the ball bearings. Remove the bearing
from the mid-gear shaft. If the mid-PTO oil seal is damaged, worn or
scratched, replace it. Apply grease to the lip and the outer of the
mid-PTO oil seal. After installing the mid-gear, apply liquid gasket to
the joint surface of transmission case and the mid-PTO case.
Kubota B2601, B26, B26TLB HST - Transmission
Case Servicing
Checking Bearing
Hold the inner race, and push and pull the outer race in all directions
to check for wear and roughness. Apply transmission fluid to the
bearing, and hold the inner race. Then, turn the outer race to check
rotation. If there is any problem, replace it. Clutch disc wear - 1.70
to 1.90 mm / 0.067 to 0.075 in. Steel plate wear - 1.15 to 1.25 mm /
0.045 to 0.049 in. Pressure plate wear - 1.95 to 2.05 mm / 0.0768 to
0.0807 in. Piston / return spring free length - 44.0 mm / 1.73 in.
Piston return spring tension: 638.7 N / 26 mm, 143.6 lbf / 1.02 in.
Clearance between Shift Fork and Shift Gear
Groove
Insert the fork into the shift gear groove and measure the clearance
with a feeler gauge. If the clearance exceeds the allowable limit,
replace it.
Differential Gear
Clearance between Differential Case (Spiral
Bevel Gear) and Differential Side Gear
![]()
Measure the differential side gear boss O.D. with an outside micrometer.
Measure the differential case I.D. and the spiral bevel gear I.D. with
an inside micrometer, and calculate the clearance. If the clearance
exceeds the allowable limit, replace damage parts.
Clearance between Differential Pinion Shaft
and Differential Pinion
Measure the differential pinion shaft O.D. with an outside micrometer.
Measure the differential pinion I.D. with an inside micrometer, and
calculate the clearance. If the clearance exceeds the allowable limit,
replace damage parts. Clearance between shift fork and shift gear groove
- 0.10 to 0.35 mm / 0.004 to 0.014 in. Clearance between differential
case (spiral bevel gear) and differential side gear - 0.025 to 0.066 mm
/ 0.0010 to 0.0026 in. Differential case I.D - 32.000 to 32.025 mm /
1.2598 to 1.2608 in. Spiral bevel gear I.D - 32.000 to 32.025 mm /
1.2598 to 1.2608 in. Differential side gear O.D - 31.959 to 31.975 mm /
1.2582 to 1.2589 in. Clearance between differential pinion shaft and
differential pinion - 0.048 to 0.084 mm / 0.0019 to 0.0033 in.
Differential pinion I.D - 16.032 to 16.050 mm / 0.63119 to 0.63188 in.
Differential pinion shaft O.D - 15.966 to 15.984 mm / 0.62859 to 0.62929
in.
Backlash between Differential Pinion and
Differential Side Gear
Secure the differential case with a vise. Set the dial indicator (lever
type) with its finger on the tooth of the differential side gear. Press
differential pinion and side gear against the differential case. Hold
the differential pinion and move the differential side gear to measure
the backlash. If the backlash exceeds the allowable limit, adjust with
differential side gear shims. Thickness of shims: 0.80 mm (0.0315 in.),
1.00 mm (0.0394 in.), 1.20 mm (0.0472 in.). Backlash between
differential pinion and differential side gear 0.1 to 0.3 mm / 0.004 to
0.0012 in.
Backlash between Spiral Bevel Pinion and
Spiral Bevel Gear
Set the dial indicator (lever type) with its finger on the end of spiral
bevel pinion. Move the spiral bevel pinion back and forth to each end
and measure the side clearance. If the side clearance exceeds the
factory specifications, adjust with the shims at front end of spiral
bevel pinion. Set the dial indicator (lever type) with its finger on the
tooth surface of bevel gear. Measure the backlash by fixing the spiral
bevel pinion and moving bevel gear by hand. If the backlash exceeds the
factory specifications, adjust with the shims at bearing holder and
differential case. Adjust the backlash properly by repeating the above
procedure. Movement of spiral bevel pinion shaft at shaft directions - 0
mm / 0 in. Backlash between spiral bevel pinion and spiral bevel gear -
0.10 to 0.30 mm / 0.0039 to 0.0012 in.
________________________________________________________________________________
________________________________________________________________________________________
 SPECIFICATIONS
 LOADERS
 ENGINES
 MAINTENANCE
 PROBLEMS
________________________________________________________________________________________
| KUBOTA TRACTORS SPECIFICATIONS |
 B1241
B1241 B1600
B1600 B1700
B1700 B1750
B1750 B21 Backhoe
________________________________________________________________________________________
 B2150
B2150 B2301
B2301 B2320
B2320 B2530
B2530 B26 Backhoe
________________________________________________________________________________________
 B2601
B2601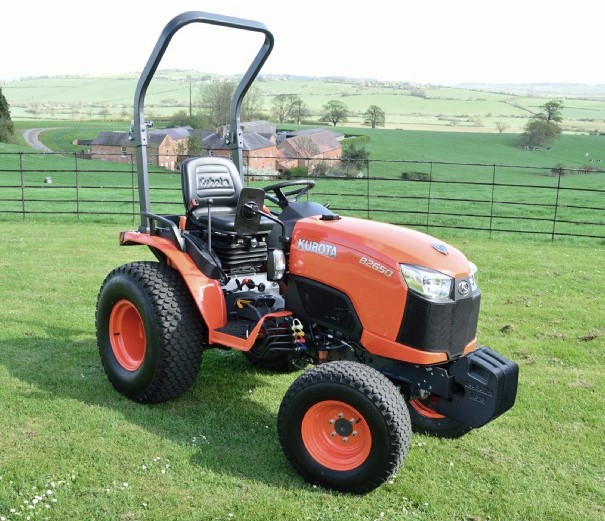 B2650HSD
 B3030
B3030 B3350
B3350 B6000
B6000________________________________________________________________________________________
________________________________________________________________________________________
 B6100
B6100 B6200
B6200 B7000
B7000 B7001
B7001 B7100HST
________________________________________________________________________________________
 B7200
B7200 B7500
B7500 B7510
B7510 B7800
B7800 B8200HST
________________________________________________________________________________________
 BX1880
 BX2200
 BX2230
 BX2350
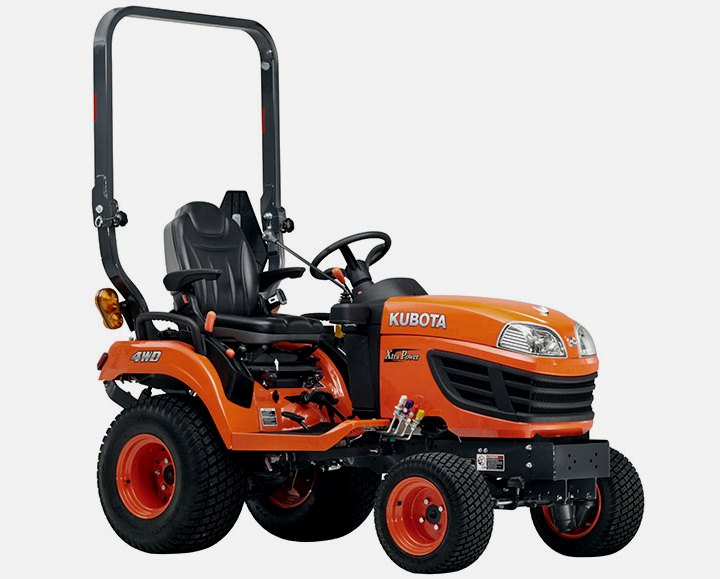 BX2370
________________________________________________________________________________________
 BX23S
BX23S BX25 TLB
 BX2660
 BX2680
 F3680
F3680________________________________________________________________________________________
________________________________________________________________________________________
 L175
L175 L185
L185 L210
L210 L225
L225 L235
L235________________________________________________________________________________________
 L245
L245 L260
L260 L275
L275 L285
L285 L305
L305________________________________________________________________________________________
 GR2120
 L1501
L1501 L2350
L2350 L2550
L2550 L2800
L2800________________________________________________________________________________________
 L3010
L3010 L3200HST
 L3301
L3301 L3400
L3400 L3560
L3560________________________________________________________________________________________
 L3800
L3800 L4701
L4701 L5740
L5740 M5-091
 M5-111
________________________________________________________________________________________
 M6060
M6060 M7040
M7040 M9540
M9540 M9960
M9960 MX5100
________________________________________________________________________________________
| KUBOTA ENGINES DATA AND SERVICE SPECS |
 D662
D662 D722
D722 D750
D750 D782
D782 D850
D850________________________________________________________________________________________
 D902
D902 D905
D905 D950
D950 D1005
D1005 D1100
D1100________________________________________________________________________________________
 D1105
D1105 D1503
D1503 D1703
D1703 D1803
D1803 V1200
V1200________________________________________________________________________________________
 V1205
V1205 V1305
V1305 V1505
V1505 V2203
V2203 V2403
V2403________________________________________________________________________________________
 Z482
Z482 Z602
Z602 Z750
Z750 Z1100
Z1100 Z1300
Z1300________________________________________________________________________________________
| KUBOTA FRONT END LOADERS |
 B1630
B1630 BF400
BF400 BF400G
 LA181
LA181 LA203
LA203________________________________________________________________________________________
 LA211
LA211 LA243
LA243 LA271
LA271 LA272
LA272 LA301
LA301________________________________________________________________________________________
 LA302
LA302 LA304
LA304 LA340
LA340 LA344
LA344 LA351
LA351________________________________________________________________________________________
 LA352
LA352 LA364
LA364 LA401
LA401 LA402
LA402 LA403
LA403________________________________________________________________________________________
 LA434
LA434 LA463
LA463 LA481
LA481 LA482
LA482 LA504
LA504________________________________________________________________________________________
 LA513
LA513 LA514
LA514 LA524
LA524 LA525
LA525 LA534
LA534________________________________________________________________________________________
 LA555
LA555 LA680
LA680 LA681
LA681 LA682
LA682 LA703
LA703________________________________________________________________________________________
 LA714
LA714 LA723
LA723 LA724
LA724 LA764
LA764 LA765
LA765________________________________________________________________________________________
 LA805
LA805 LA844
LA844 LA852
LA852 LA853
LA853 LA854
LA854________________________________________________________________________________________
 LA1002
 LA1055
 LA1065
 LA1153
 LA1154
________________________________________________________________________________________
 LA1251
 LA1301S
 LA1353
 LA1403
 LA1601S
________________________________________________________________________________________
 LA1854
 LA1944
 LA1953
 LA2253
 LM2605
________________________________________________________________________________________
| KUBOTA TRACTORS TROUBLESHOOTING | ||||
| L235 | L2501 | L2550 | L275 | L3110 |
| L3301 | L35 | L3710 | L3901 | L4310 |
| L5030 | M4700 | M5700 | M6040 | M6800 |
| M8200 | M8540 | M9000 | MX5100 | MX5200 |