________________________________________________________________________________
Kubota BX23, BX23S, BX24, BX25, BX25D Front axle - Adjusting, service and repair
Kubota BX23, BX23S, BX25, BX25D Front axle - Check and adjust
Adjusting toe-in
Inflate the tires to the specified pressure. Turn the front wheels straight ahead. Measure the toe-in ((Wheel to wheel distance at front) - (Wheel to wheel distance at rear)). If the measurement is not within the factory specifications, adjust the tie-rod length. Toe-in ((Wheel to wheel distance at front) - (Wheel to wheel distance at rear)) - 0 to 5 mm / to 0.2 in. Loosen the lock nuts and turn the tie-rod to adjust the rod length until the proper toe-in measurement is obtained. Re-tighten the lock nuts
Adjusting front axle rocking force
Jack up the front side of Kubota BX23, BX23S, BX24, BX25, BX25D tractor and remove the front wheel. Set a spring balance to the front gear case cover. Measure the front axle rocking force. If the measurement is not within the factory specifications, adjust as following. Front axle rocking force - 49.0 to 300 N / 11.1 to 67.4 lbf. Remove the cotter pin. Tighten or loosen the adjusting nut so that the measurement of rocking force comes to factory specifications. If the slot and pin hole do not meet, align the nut until they do meet within factory specifications. Install the new cotter pin
Adjusting front wheel steering angle
Steering angle: Right side 0.84 to 0.87 rad (48
to 50 deg) / Left side 0.93 to 0.95 rad (53 to 55 deg). Length of
adjusting bolt: Right side 23 mm (0.91 in.) / Left side 16 mm (0.63
in.). Inflate the tires to the specified pressure. Loosen the lock nut
and shorten the length of stopper bolt L.H. Steer the wheels to the
extreme left. Lengthen the length of stopper bolt until the stopper bolt
contacts with the bevel gear case. Return the steering wheel to straight
ahead and lengthen the stopper bolt 1/2 turns from above position
further. Lock the stopper bolt by lock nut. For adjusting the right
steering angle, perform the same procedure as mentioned in left steering
angle.
Front axle assembly and differential gear
Draining front axle case oil - Place the oil pans underneath the front axle case. Remove both right and left hand side drain plugs and filling plug to drain the oil. After draining, reinstall the drain plugs. After a few minutes, check the oil level again, add oil to prescribed level. When re-filling, remove the right and left breather plugs. Front axle case oil Capacity - 4.7L. Removing battery - Remove the under panel. Disconnect the negative cable from the battery. Disconnect the positive cable from the battery and remove the battery. Removing bonnet - Remove the front guard. Open the bonnet. Disconnect the headlight harness from the headlights and bonnet. Disconnect the bonnet guide rod from the bonnet. Disconnect the L.H. and R.H. bonnet brackets from the frame. Remove the bonnet.
Removing front wheel and propeller shaft cover
Lift up the front of Kubota BX23, BX23S, BX24, BX25, BX25D tractor and place the disassembling stand under the front axle frame. Remove the front wheels. Remove the propeller shaft cover mounting bolt and slide the propeller shaft cover. Front wheel mounting screw - 149 to 179 Nm / 110 to 132 lbf-ft. Disconnecting propeller shaft - Tap out the spring pins and disconnect the universal joint and spiral bevel pinion shaft. Apply grease to the splines of the propeller shaft and universal joint.
Removing front axle assembly
Remove the power
steering hose clamp. Place the garage jack under the front axle. Remove
the cotter pin. Remove the slotted nut of center pin and separate the
front axle from the frame. Disconnect the power steering hoses. After
mounting the front axle assembly to the frame, be sure to adjust the
front axle rocking force. Installing the cotter pin, be sure to split
the cotter pin like an anchor. Power steering hose - 24 to 27 Nm / 18 to
20 lbf-ft.
Removing power steering cylinder
Remove the cotter pin and remove the slotted nut for tie-rod. Remove the power steering cylinder mounting screws and remove the power steering cylinder with tie-rod. Tighten the slotted nut. If the slot and pin hole do not meet, tighten the nut until they do meet, and install the cotter pin. Removing bevel gear case and front gear case - Remove the bevel gear case mounting screws. Remove the bevel gear case and front gear case as a unit from the front axle case. Bevel gear case mounting screw (M10) - 48 to 55 Nm / 36 to 41 lbf-ft. Bevel gear case mounting screw (M12) - 78 to 90 Nm / 58 to 66 lbf-ft.
Removing front gear case cover
Remove the front gear case mounting
screws and remove the front gear case coverwith bevel gear. Front gear
case cover mounting screw (Kubota BX23, BX23S, BX24, BX25, BX25D) - 48
to 55 Nm / 36 to 41 lbf-ft. Removing 36T bevel gear and front axle shaft
- Remove the ball bearing. Remove the 36T bevel gear. Remove the collar.
Tap out the axle shaft. Removing front gear case and bevel gear case -
Remove the internal snap ring. Remove the bevel gear with ball bearing
and shim. Remove the bevel gear. Remove the external snap ring. Remove
the bevel gear case from front gear case. Remove the oil seal and the
ball bearing. Remove the internal snap ring and remove the ball bearing.
Remove the bevel gear shaft with ball bearing.
Removing bevel pinion shaft and differential gear assembly
Remove the differential yoke shaft. Remove the oil seal. Remove the internal snap ring. Pull out the bevel pinion shaft. Remove the differential gear assembly, from right side of front axle case. Remove the stake of lock nut, and then remove the lock nut. Remove the taper roller bearing. Apply gear oil to the taper roller bearings and install them correctly, noting their direction. Replace the lock nut and oil seal with new ones. After tighten the lock nut to the specified torque, stake it firmly. Install the adjusting collars to their original position.
Removing differential gear
Remove the bevel gear with bearing and ball bearing by puller. Remove the spring pin. Remove the differential pinion shaft. Remove the differential pinions, differential side gears and shims. Apply molybdenum disulfide to the inner circumferential surface of the differential side gears, differential pinions and shims.
Kubota BX23, BX23S, BX24, BX25, BX25D Front axle - ServicingChecking clearance
Checking clearance between differential case and differential side gear - Measure the differential side gear boss O.D. Differential side gear O.D - 25.939 to 25.960 mm / 1.0213 to 1.0220 in. Measure the differential case bore I.D., and calculate the clearance. Differential case bore I.D - 26.000 to 26.021 mm / 1.0237 to 1.0244 in. Measure the differential case cover bore I.D., and calculate the clearance. If the clearance exceeds the allowable limit, replace damaged parts. Clearance between differential case and differential side gear (Kubota BX23, BX23S, BX24, BX25, BX25D) - 0.040 to 0.082 mm / 0.0016 to 0.0032 in.
Checking clearance between differential pinion shaft and differential pinion - Measure the differential pinion shaft O.D. Differential pinion shaft O.D - 9.960 to 9.975 mm / 0.3922 to 0.3927 in. Measure the differential pinion I.D., and calculate the clearance. Differential pinion I.D - 10.000 to 10.015 mm / 0.39370 to 0.39429 in. If the clearance exceeds the allowable limit, replace damaged parts. Clearance between differential pinion shaft and differential pinion - 0.025 to 0.055 mm / 0.00099 to 0.0021 in.
Checking clearance between center pin and pin support bushing - Measure the center pin O.D. with an outside micrometer. Center pin O.D - 19.850 to 20.000 mm / 0.78150 to 0.78740 in. Measure the pin support bush I.D. of the front axle with a cylinder gauge. Bush I.D - 20.000 to 20.081 mm / 0.78741 to 0.79059 in. If the clearance exceeds the allowable limit, replace it. Clearance between center pin and pin support bush - 0 to 0.231 mm / 0 to 0.00909 in.
Checking backlash
Checking backlash between differential pinion and differential side gear
- Set a dial gauge (lever type) on a tooth of the differential pinion.
Fix the differential side gear, and move the differential pinion to
measure the backlash. If the measurement exceeds the factory
specifications, adjust with the differential side gears shims. Backlash
between differential pinion and differential side gear - 0.1 to 0.3 mm /
0.004 to 0.01 in. Thickness of adjusting shims: For side gear - 0.80 mm
/ 0.031 in. 1.0 mm / 0.039 in. 1.2 mm / 0.047 in. For pinion - 3.30 mm /
0.130 in. 3.50 mm / 0.138 in. 3.70 mm / 0.146 in. 3.90 mm / 0.154 in.
Checking turning torque of bevel pinion shaft - Clamp the spiral bevel pinion shaft assembly to the vise and tighten the staking nut. Measure the turning torque of bevel pinion shaft. If the turning torque is not within the factory specifications, adjust with the lock nut. Turning torque - 0.80 to 1.0 Nm / 0.59 to 0.73 lbf-ft.
Checking backlash between bevel pinion shaft and bevel gear - Put the wire of solder or plastigauge on the position where the tooth proper contact of bevel pinion shaft. Wire of solder Thickness - 0.5 mm / 0.02 in. Fix the bevel gear and rotate the bevel pinon shaft carefully. Measure the backlash. If the backlash is not within the factory specifications, change the adjusting collar. Backlash between bevel pinion shaft and bevel gear - 0.1 to 0.3 mm / 0.004 to 0.01 in. Adjust the backlash properly by repeating the above procedures.
Checking backlash between 12T bevel gear and 15T bevel gear - Stick a strip of wire of solder or plastigauge to three spots on the 15T bevel gear with grease. Fix the front axle case, bevel gear case and front gear case. Turn the axle. Remove the bevel gear case from front axle case and measure the backlash. If the backlash is not within the factory specifications, adjust with shim. Backlash between 12T bevel gear and 15T bevel gear - 0.1 to 0.3 mm / 0.004 to 0.01 in. Thickness of adjusting shims - 0.8 mm / 0.03 in. 1.0 mm / 0.039 in. 1.2 mm / 0.047 in. 1.4 mm / 0.055 in. Tooth contact More than 35%.
- Kubota BX23, BX23S, BX24, BX25, BX25D Transaxle adjusting
- Kubota BX23, BX23S, BX24, BX25, BX25D Transaxle service
- Kubota BX23, BX23S, BX24, BX25, BX25D hydrostatic transmission
- Kubota BX23, BX23S, BX24, BX25, BX25D Steering
- Kubota BX23, BX23S, BX24, BX25, BX25D hydraulic system
- Kubota BX23, BX23S, BX24, BX25, BX25D electrical system
________________________________________________________________________________
________________________________________________________________________________________
________________________________________________________________________________________
________________________________________________________________________________________
________________________________________________________________________________________
________________________________________________________________________________________
________________________________________________________________________________________
________________________________________________________________________________________
________________________________________________________________________________________
________________________________________________________________________________________
________________________________________________________________________________________
________________________________________________________________________________________
________________________________________________________________________________________
________________________________________________________________________________________
________________________________________________________________________________________
________________________________________________________________________________________
________________________________________________________________________________________
________________________________________________________________________________________
________________________________________________________________________________________
________________________________________________________________________________________
________________________________________________________________________________________
________________________________________________________________________________________
________________________________________________________________________________________
________________________________________________________________________________________
________________________________________________________________________________________
________________________________________________________________________________________
________________________________________________________________________________________
________________________________________________________________________________________
________________________________________________________________________________________

 SPECIFICATIONS
 LOADERS
 ENGINES
 INSTRUCTIONS
 PROBLEMS
 B2320
B2320 B2630
B2630 B2920
B2920 B3300SU
 BX2360
 L245
L245 L260
L260 L275
L275 L285
L285 L305
L305 D662
D662 D722
D722 D750
D750 D782
D782 D850
D850 LA302
LA302 LA304
LA304 LA340
LA340 LA344
LA344 LA351
LA351 BX2660
 L2501
L2501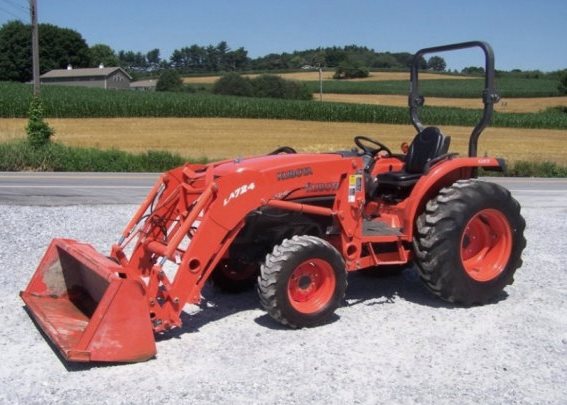 L3240
L3240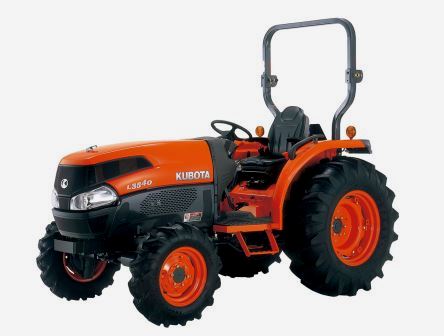 L3540
L3540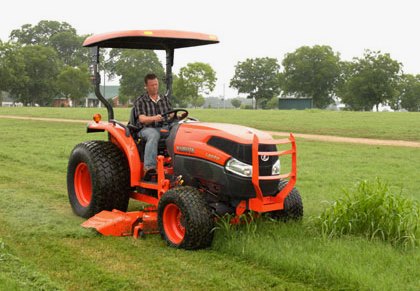 L3940
L3940 D902
D902 D905
D905 D950
D950 D1005
D1005 D1100
D1100 B1630
B1630 BF400
BF400 BF400G
 LA181
LA181 LA203
LA203 LA211
LA211 LA243
LA243 LA271
LA271 LA272
LA272 LA301
LA301 L175
L175 L185
L185 L210
L210 L225
L225 L235
L235 D1105
D1105 D1503
D1503 D1703
D1703 D1803
D1803 V1200
V1200 L4400
L4400 L4600
L4600 L5040
L5040 L5740
L5740 MX4700
 LA352
LA352 LA364
LA364 LA401
LA401 LA402
LA402 LA434
LA434 LA463
LA463 LA481
LA481 LA482
LA482 LA504
LA504 V1205
V1205 V1305
V1305 V1505
V1505 V2203
V2203 V2403
V2403 B2710
B2710 BX23S
BX23S B3350
B3350 BX1880
 L4701
L4701 LA513
LA513 LA514
LA514 LA524
LA524 LA525
LA525 LA534
LA534 LA555
LA555 LA680
LA680 LA681
LA681 LA682
LA682 LA703
LA703 Z482
Z482 Z602
Z602 Z750
Z750 Z1100
Z1100 Z1300
Z1300 M100GX
 M135GX
 M6040
M6040 M8540
M8540 M95X
M95X LA714
LA714 LA723
LA723 LA724
LA724 LA764
LA764 LA765
LA765 LA805
LA805 LA844
LA844 LA852
LA852 LA853
LA853 LA854
LA854 M5-091
 BX2680
 MX5200
 BX2380
 L3901
L3901 LA1002
 LA1055
 LA1065
 LA1153
 LA1154
 LA1251
 LA1301S
 LA1353
 LA1403
 LA1601S
 LA1854
 LA1944
 LA1953
 LA2253
 LM2605